When it comes to cooking chicken, especially split chicken breasts, one of the most common questions is: how do you tenderize them for the best flavor and texture? The good news is that tenderizing chicken isn’t as hard as you might think. Whether you’re preparing a weekday dinner or hosting a special meal, knowing how to tenderize split chicken breasts can make all the difference.
Understanding Split Chicken Breasts
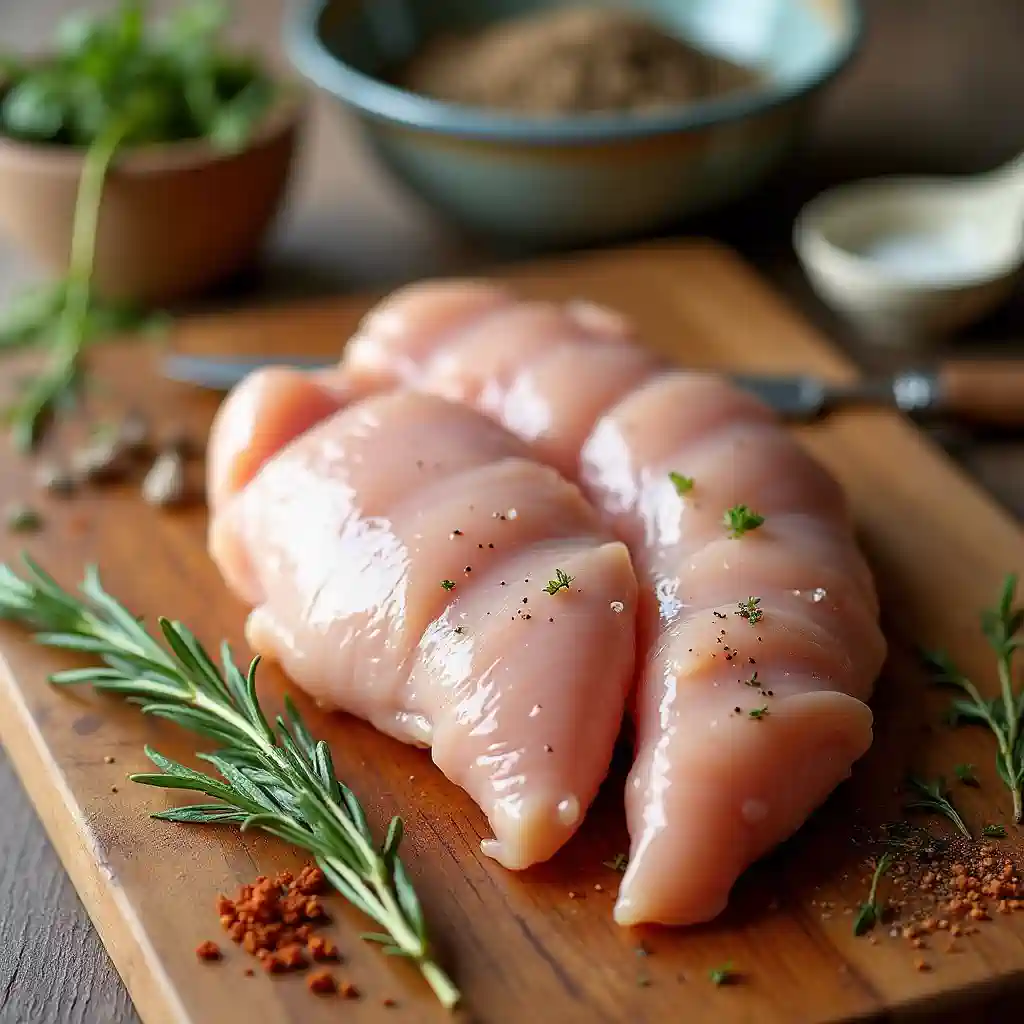
To Tenderize Split Chicken Breast effectively, it helps to understand the cut you’re working with. Split chicken breasts are slightly different from the boneless, skinless versions you might be more familiar with.
What is a Split Chicken Breast?
A split chicken breast is essentially a chicken breast with the bone and skin still attached. The term “split” refers to the fact that the breast is divided into two halves. These cuts are larger and typically juicier than their boneless counterparts.
“Think of split chicken breasts as the superhero version of chicken cuts—they’re meatier, juicier, and full of flavor thanks to the bone and skin.”
Unlike boneless chicken, split chicken breasts take a little longer to cook, but the bone and skin contribute to richer flavors and a more satisfying bite.
Why is Tenderizing Split Chicken Breast Important?
Chicken breasts can be naturally tough if not handled properly. Tenderizeing Split Chicken Breast isn’t just about making the meat softer; it’s about improving the overall eating experience. Tenderized chicken:
- Absorbs marinades better.
- Cooks more evenly.
- Has a juicier, more pleasant texture.
“Tenderizing Split Chicken Breast is like giving your chicken a pre-cooking massage—it relaxes the meat and prepares it to soak up all those delicious flavors.”
Benefits of Tenderizing Split Chicken Breasts
Why go the extra mile to tenderize? The answer lies in the results you’ll achieve.
Improved Texture and Flavor
Tenderizing transforms the texture of the chicken, making it soft and easier to chew. When done right, it also enhances the flavors by helping marinades and seasonings penetrate deeper into the meat.
Enhanced Cooking Results
Have you ever cooked chicken only to find one part dry and the other undercooked? Tenderizing can fix this. It helps even out the thickness of the meat, ensuring consistent cooking from edge to edge.
“Imagine biting into chicken that’s tender, juicy, and bursting with flavor—that’s the magic of proper tenderizing.”
Best Ways to Tenderize Split Chicken Breast Effectively

There’s no one-size-fits-all method for tenderizing chicken, but here are a few popular techniques you can try.
Using a Meat Mallet to Tenderize Split Chicken Breast
This classic method involves physically breaking down the fibers of the meat. Here’s how:
- Prepare the Chicken: Place the chicken breast between two sheets of plastic wrap or parchment paper.
- Pound Gently: Use the flat side of a meat mallet to pound the chicken evenly. Start from the thickest part and work your way out.
- Aim for Uniform Thickness: This ensures even cooking and a tender texture.
How to Marinate and Tenderize Split Chicken Breast

Marinades that contain acidic ingredients like lemon juice, vinegar, or buttermilk are excellent for tenderizing. Acids break down proteins in the chicken, softening the meat over time.
Simple Marinade Recipe:
- Ingredients:
- ½ cup buttermilk
- 2 tbsp olive oil
- 1 tsp garlic powder
- 1 tsp paprika
- Juice of 1 lemon
- Directions:
- Combine all ingredients in a bowl.
- Submerge the chicken in the marinade and refrigerate for at least 2 hours (or overnight for best results).
Why Brining is Ideal for Tenderizing Split Chicken Breast
Brining involves soaking the chicken in a saltwater solution. It’s not just about tenderizing—it also adds moisture to the meat, making it juicier when cooked.
Brine Recipe:
- Ingredients:
- 4 cups water
- ¼ cup salt
- 2 tbsp sugar
- Optional: rosemary, garlic cloves, or peppercorns
- Directions:
- Dissolve the salt and sugar in water.
- Add optional herbs or spices for extra flavor.
- Submerge the chicken and refrigerate for 1–6 hours.
Dry Rubs for Quick Tenderization of Split Chicken Breast
If you’re short on time, a dry rub can do wonders. The salt in the rub helps tenderize the meat, while the spices add a burst of flavor.
Dry Rub Mix:
- 1 tsp salt
- 1 tsp black pepper
- 1 tsp paprika
- ½ tsp garlic powder
Rub it generously over the chicken, let it rest for 20–30 minutes, and you’re ready to cook.
Step-by-Step Guide to Tenderizing Split Chicken Breasts
Tenderizing chicken might sound complicated, but it’s actually straightforward. Follow these step-by-step instructions to achieve perfectly tender chicken every time.
Preparing the Chicken
Before you start tenderizing, it’s essential to prepare your split chicken breasts properly:
- Thaw Completely: If your chicken is frozen, let it thaw in the refrigerator overnight. Tenderizing partially frozen meat can damage the fibers unevenly.
- Trim Excess Fat: Use a sharp knife to remove any excess fat or skin that might not render during cooking.
- Pat Dry: Moisture on the surface can interfere with the tenderizing process, so use paper towels to dry the chicken.
Choosing the Right Tenderizing Split Chicken Breast Method
Each method has its unique benefits. Here’s how to pick the one that’s best for your recipe:
- For Grilled or Roasted Chicken: Use a meat mallet to ensure even cooking and perfect grill marks.
- For Recipes with Marinades: Opt for an acid-based marinade to enhance flavor while tenderizing.
- For Moist, Juicy Chicken: Try brining to add both moisture and tenderness.
Tips for Best Results
Tenderizing is as much an art as it is a science. These tips will help you get it just right:
- Don’t Overdo It: Pounding too hard with a meat mallet can tear the meat, leaving it uneven and less appealing.
- Time Your Marinades: Longer isn’t always better. Acidic marinades can make the meat mushy if left too long—stick to 2–6 hours.
- Keep it Clean: Place your chicken between plastic wrap or in a sealable bag when tenderizing to avoid splatter and contamination.
“Tenderizing Split Chicken Breast is like prepping a canvas—you want it smooth and even before adding the masterpiece of flavors.”
Common Mistakes When Tenderizing Split Chicken Breast
Even the most seasoned cooks can make mistakes when tenderizing. Here are some common pitfalls and how to avoid them.
Over-Tenderizing the Meat
Too much pounding or excessive marinating can break down the chicken’s structure, leaving it mushy.
How to Avoid It:
- Use gentle, even pressure with a mallet.
- Follow recommended marinating times—don’t exceed 24 hours.
Using the Wrong Ingredients
Not all tenderizing agents are created equal. Some acids, like straight vinegar or citrus, can overpower the chicken’s flavor.
Solution:
- Balance acids with fats (like olive oil) and seasonings for a well-rounded marinade.
- If you’re unsure, test your marinade on a small piece of chicken first.
Skipping the Resting Time
After tenderizing, it’s crucial to let the chicken rest before cooking. This allows the fibers to relax and the flavors to settle.
Quick Tip: Rest your chicken for 10–15 minutes after tenderizing for optimal results.
“Skipping the resting phase is like baking a cake without letting it cool—you’ll miss out on the perfect texture.”
Troubleshooting: How to Fix Tough Chicken Breasts
Even with the best intentions, chicken can sometimes turn out tough. Don’t worry—here’s how to salvage your meal.
Adjusting Cooking Times for Better Texture
One common reason chicken turns out tough is overcooking. Use a meat thermometer to ensure the internal temperature reaches exactly 165°F (74°C). Remove it from the heat immediately.
Adding Sauces to Rehydrate Chicken
If your chicken feels dry or tough after cooking, a flavorful sauce can help bring it back to life. Here’s a quick fix:
Simple Pan Sauce:
- Sauté minced garlic in butter.
- Add chicken broth, a splash of cream, and a pinch of salt.
- Simmer until slightly thickened and pour over the chicken.
“A good sauce is like a magic wand—it can turn any cooking mishap into a delicious masterpiece.”
Popular Recipes for Tenderized Split Chicken Breasts
Tenderizing split chicken breasts unlocks a world of delicious possibilities. Here are some tried-and-true recipes that showcase the best of this technique.
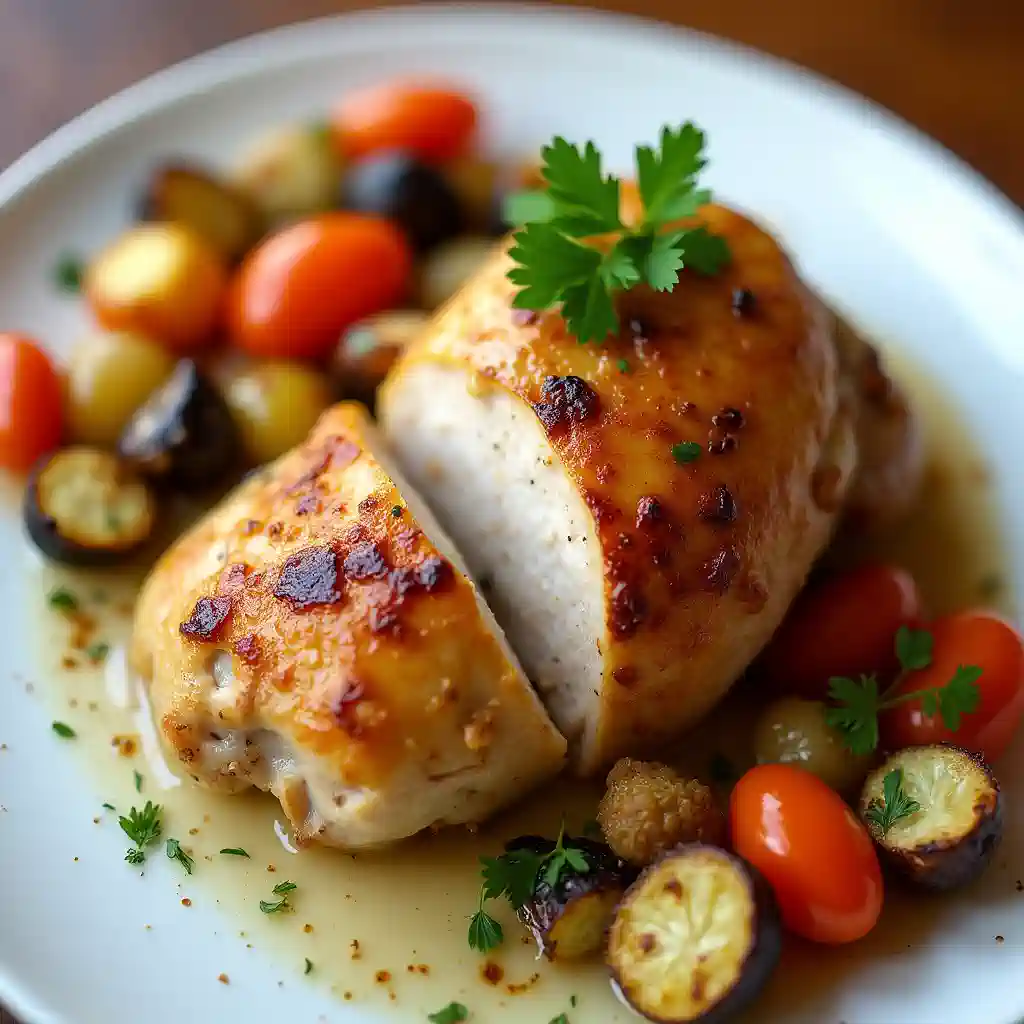
Herb-Marinated Grilled Split Chicken Breast
Ingredients:
- 2 split chicken breasts
- 3 tbsp olive oil
- 2 tbsp lemon juice
- 2 cloves garlic, minced
- 1 tbsp fresh rosemary, chopped
- 1 tsp salt
- ½ tsp black pepper
Directions:
- Tenderize the chicken with a meat mallet until even in thickness.
- In a bowl, mix olive oil, lemon juice, garlic, rosemary, salt, and pepper.
- Marinate the chicken for 2–4 hours in the refrigerator.
- Preheat the grill to medium heat and cook for 8–10 minutes per side, or until the internal temperature reaches 165°F (74°C).
Crispy Pan-Seared Chicken
Ingredients:
- 2 split chicken breasts, tenderized
- 2 tbsp vegetable oil
- ½ cup all-purpose flour
- 1 tsp paprika
- 1 tsp garlic powder
- ½ tsp salt
Directions:
- Mix flour, paprika, garlic powder, and salt in a bowl.
- Dredge the tenderized Split Chicken Breast in the mixture, coating evenly.
- Heat oil in a skillet over medium heat.
- Cook the chicken skin-side down for 6–7 minutes, then flip and cook for another 5 minutes.
Oven-Baked Juicy Chicken
Ingredients:
- 2 split chicken breasts
- 2 tbsp olive oil
- 1 tbsp dried thyme
- 1 tsp garlic powder
- ½ tsp salt
- ½ tsp black pepper
Directions:
- Preheat the oven to 375°F (190°C).
- Rub the tenderized Split Chicken Breast with olive oil and season with thyme, garlic powder, salt, and pepper.
- Place on a baking tray and bake for 40–50 minutes, or until the internal temperature reaches 165°F (74°C).
“These recipes prove that tenderized chicken isn’t just a technique—it’s a gateway to tastier meals!”
Frequently Asked Questions About Tenderizing Split Chicken Breasts
How Long Should You Marinate Chicken?
Marinate split chicken breasts for 2–6 hours. For deeper flavors, overnight marination works well, but avoid exceeding 24 hours to prevent mushiness.
Can You Tenderized Split Chicken Breasts Without Tools?
Absolutely! A rolling pin, the back of a heavy skillet, or even your hands can work as substitutes for a meat mallet. Place the chicken between plastic wrap to keep things clean.
Is Brining Necessary for Split Chicken Breasts?
While not essential, brining is an excellent way to enhance both tenderness and moisture, especially for larger cuts like split chicken breasts.
Conclusion: Perfecting the Art of Tenderizing Split Chicken Breasts
Tenderizing split chicken breasts isn’t just a step—it’s a game-changer. From marinating and brining to mastering the use of a meat mallet, these techniques help you achieve chicken that’s juicy, flavorful, and utterly satisfying.
Key Takeaways
- Tenderizing improves texture, enhances flavor, and ensures even cooking.
- Choose the right method based on your recipe—meat mallets for even thickness, marinades for added flavor, or brining for moisture.
- Avoid common mistakes like over-tenderizing or skipping resting time to get perfect results every time.
“Cooking is about experimenting, so don’t be afraid to try new tenderizing methods. Your chicken—and your taste buds—will thank you!”